How to set up RainLoop webmail in Ubuntu server
I had originally written this tutorial for xmodulo.com
Webmail is undoubtedly an essential part of any mail server. While native email client software has typically more features compared to webmail services, accessing IMAP or SMTP server ports via an email client from outside of the trusted network can sometimes be tricky. Moreover, while you need a designated workstation, laptop, or mobile device to use an email client, you can use webmail services from anywhere as long as you have an Internet connection.
This tutorial will focus on setting up RainLoop webmail on an Ubuntu server running Apache. RainLoop is PHP-based webmail, and has the following features.
- Supports apache, nginx and other web servers.
- Standard interface supplemented with a gallery of themes to select from.
- Free to use for personal and non-profit projects.
As of this writing, there is no support for email filtering and out-of office auto replies yet.
Install RainLoop on Ubuntu Server
First of all, necessary packages are set up in the server.
# apt-get install wget unzip apache2 php5 php5-mysql libmysqlclient15-dev mysql-server poppassd
Next, RainLoop is downloaded and installed.
# mkdir /var/www/webmail
# cd /var/www/webmail
# wget http://repository.rainloop.net/v1/rainloop-1.6.3.706-e3c14e17bc4370a1561bcc68d1d494fd.zip
# unzip rainloop-1.6.3.706-e3c14e17bc4370a1561bcc68d1d494fd.zip
# rm rainloop-*.zip
# cd /var/www/webmail
# wget http://repository.rainloop.net/v1/rainloop-1.6.3.706-e3c14e17bc4370a1561bcc68d1d494fd.zip
# unzip rainloop-1.6.3.706-e3c14e17bc4370a1561bcc68d1d494fd.zip
# rm rainloop-*.zip
Then necessary permission is set.
# cd /var/www/webmail
# find . -type d -exec chmod 755 {} \;
# find . -type f -exec chmod 644 {} \;
# chown -R www-data:www-data /var/www/webmail
# find . -type d -exec chmod 755 {} \;
# find . -type f -exec chmod 644 {} \;
# chown -R www-data:www-data /var/www/webmail
We are almost ready to use RainLoop. Final adjustments are made through the admin panel, which will be described next.
First-Time Configuration via Admin Panel
Most configuration parameters can be adjusted with a user-friendly admin panel. The admin panel is accessible using the following credentials.
- URL: http://IP/webmail/?admin
- user: admin
- Pass: 12345
Of course it is recommended to change the default password as soon as possible. We will use the admin panel to adjust the following settings.
Add Domains
Domain settings is available at Admin Panel > Domains > Add Domain Page. The recommended server IP is localhost i.e., 127.0.0.1. Based on the server configuration, RainLoop can be configured to use IMAP/IMAPS or SMTP/SMTPS. Also, make sure that the 'Use short login form' checkbox is enabled.
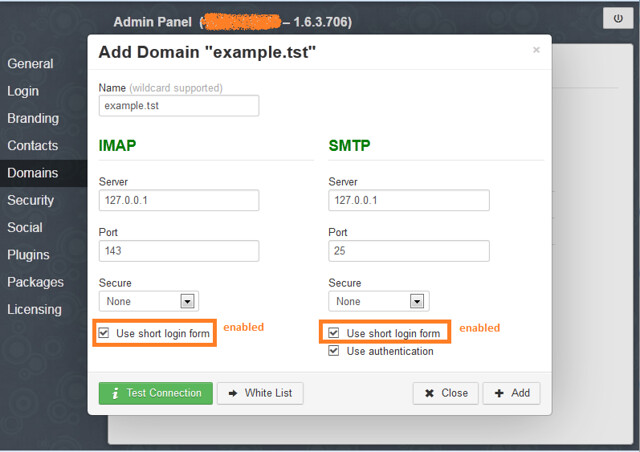
Settings can be verified using the ‘Test Connection’ button.
Enable Contacts
The contacts feature needs database support. We will be using MySQL for enabling contacts. The database required by RainLoop can be created manually as follows.
# mysql -u root -p
mysql> create database rainloop;
mysql> exit;
Now this feature can be enabled from Admin Panel > Contacts page.
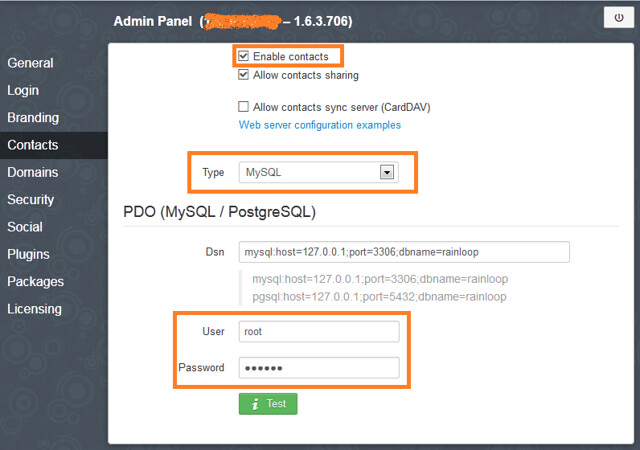
Once again, settings can be checked using the ‘Test’ button.
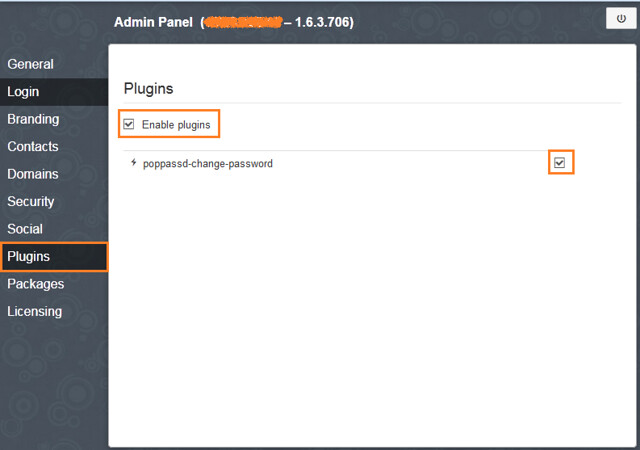
Enable Password Changing Plugin
Email accounts in most Linux-based mail servers are actual users of the operating system with their own UID and GID. Therefore, changing the password of these accounts has been tricky in the past. Fortunately, today there are tools available that can get the job done. One such tool is poppassd.
The first step is to install poppassd on the server, which can be done with apt-get.
# apt-get install poppassd
Next, to allow RainLoop to use poppassd, install RainLoop plugin for poppassd from Admin Panel > Packages page.

Finally, the poppassd plugin can be enabled from Admin Panel > Plugins page.
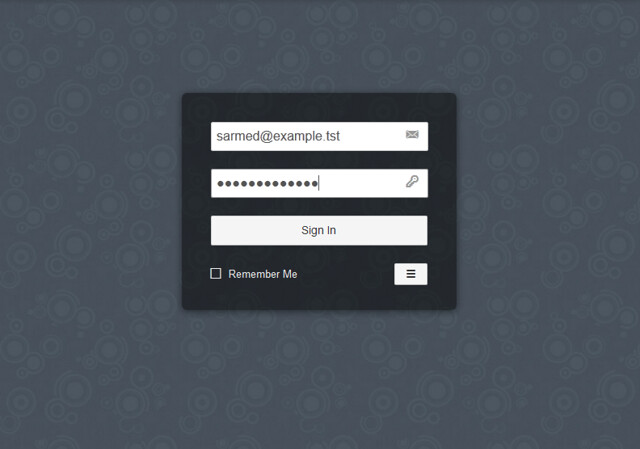
Now that all the parameters are set, a user can log in by providing their credentials as shown in the screenshot.
- URL: http://IP/webmail
- user: user@domain
- pass: password
Hope this helps.
Comments
Post a Comment